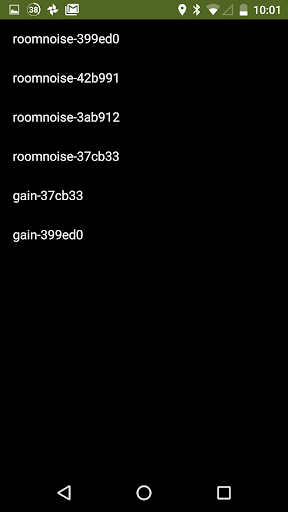
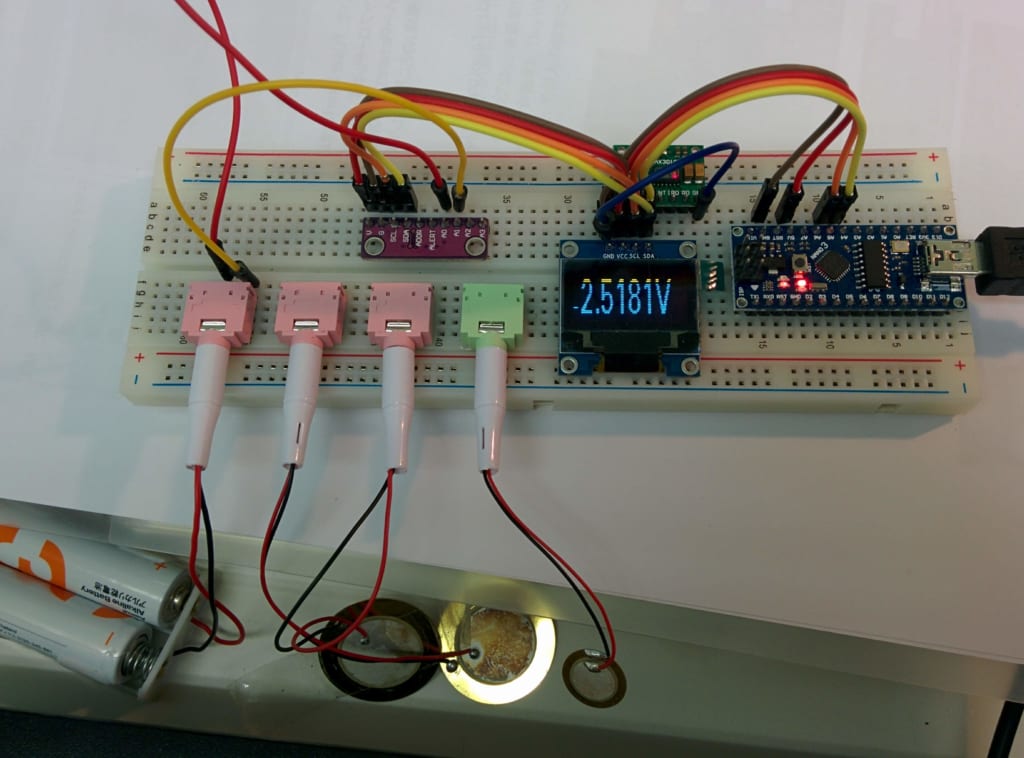
NodeMcu (4) ADS1115 & OLED

経緯

アナログ信号を取り込み、TinyWebDBへ送るプログラムを作る予定。サンプリングレートは秒に100回。
WeMos miniは使いやすいから愛用しているが、2月から、WeMos miniの開発中も頻繁にリブートしています。デバイストライバのバージョンを変えたり、OSを変えたりしても改善しない。結局原因がわからず、仕方なく開発中書き込み直前にUSBケーブル接続、書き込み終わったらすぐUSBケーブ抜く方法で運がよければリブート回避する状態が続て、悩んでいます。
ADS1115プログラムを作るため、安定したNodeMcuできることならこちらで凌ぎ。

ADS1115とは

ADS1115 は、16-Bit ADC – 4 Channel with Programmable Gain Amplifier
特徴:広い電源電圧範囲:2.0V ~ 5.5V。低消費電流: 連続モード:150μA。
_ プログラマブルゲインアンプ内蔵。プログラミング可能なコンパレータ。
_ 4本のシングルエンド入力。2本の差動入力。I2Cインターフェイス。
_ 最小±256mVから電源電圧までの入力範囲に対応。
ライブラリーでは コマンド送信し 8msec 後に データーの読み込みを行う、サンプリングレートは秒に100回するため、Adafruit_ADS1X15/Adafruit_ADS1015.hのADS1115_CONVERSIONDELAYを8から9に変更する。

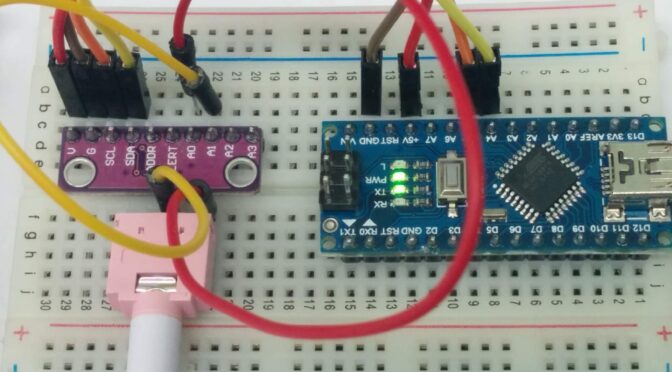
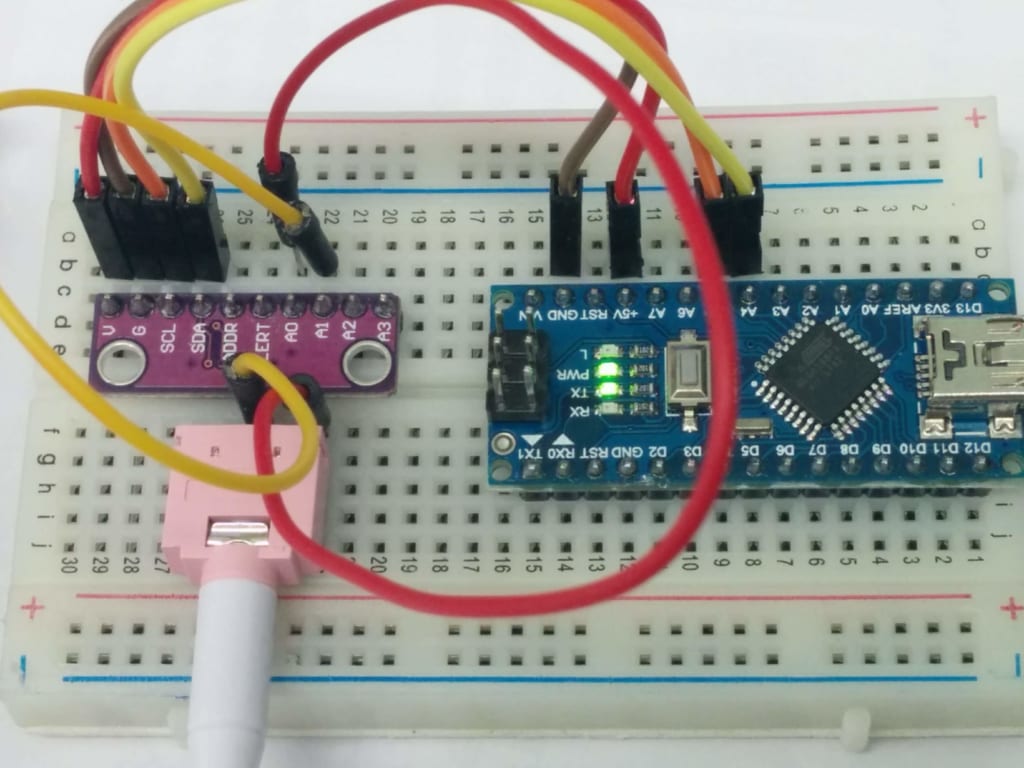
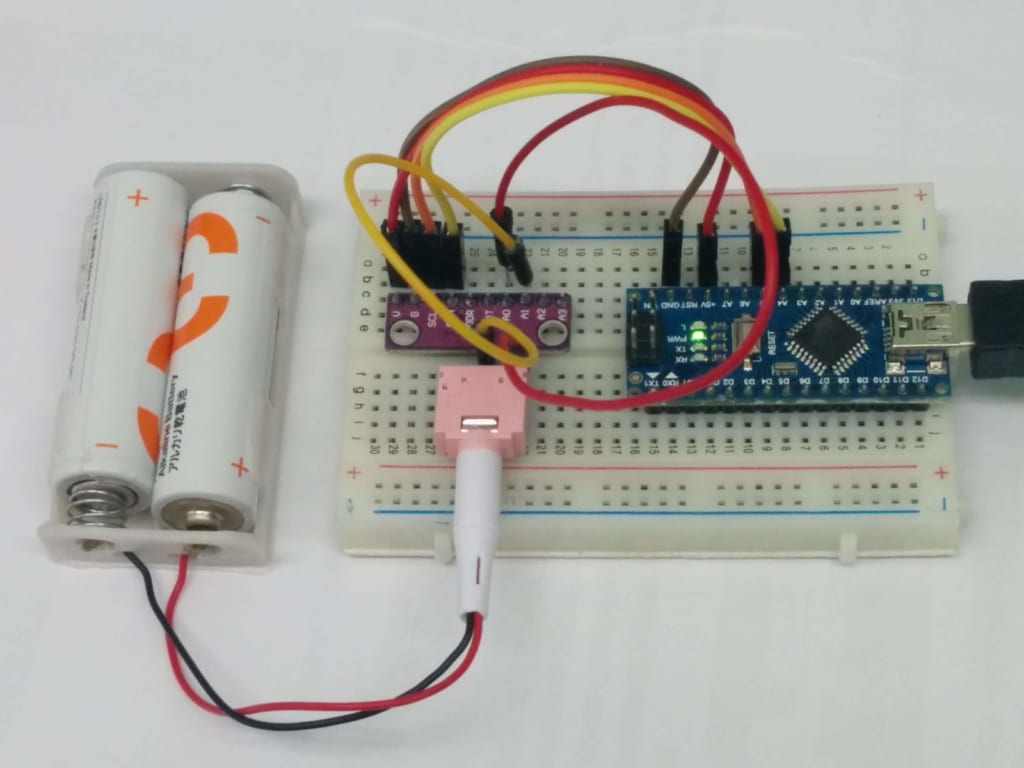
結線

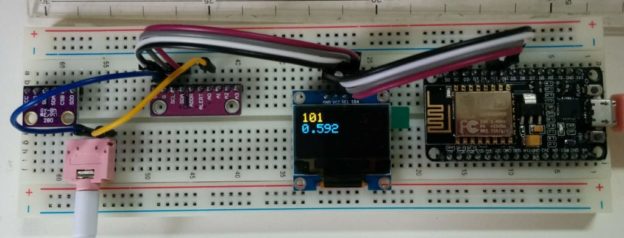
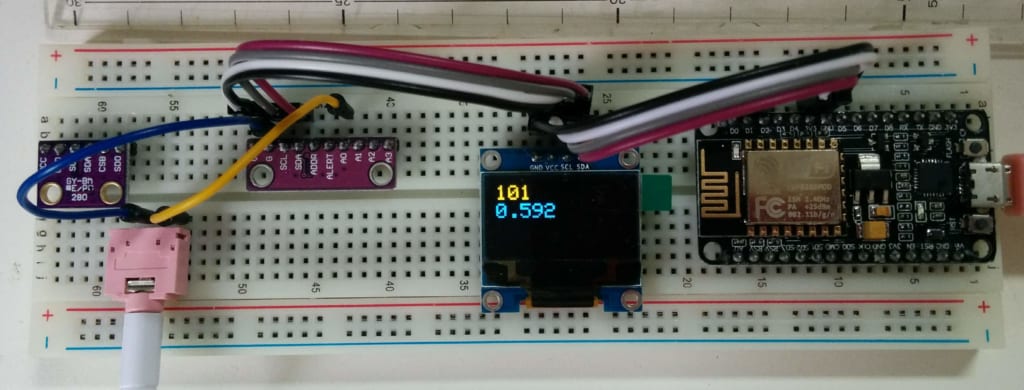
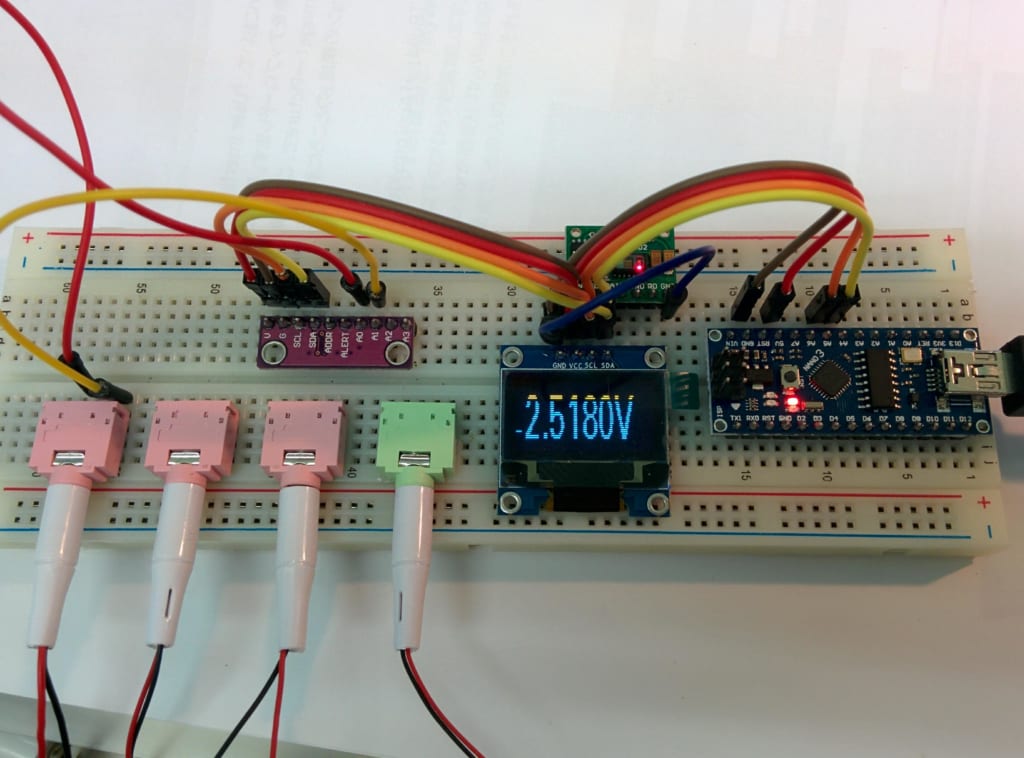
普通のI2Cでつなぐだけ。

スケッチ

最初のプログラムは、アナログ読む度に表示してるが、表示できるのは秒に十回未満。そしてOLEDには、1秒間読み取れたデータの個数と、最新のアナログ値を表示すると変更して110回程度読み込みできるようになり。
ADS1115_CONVERSIONDELAYを8から9に変更して、表示の通り、秒に101回って、概ね要求に満たした。

#include <Wire.h>
#include <Adafruit_ADS1015.h>               // ADS1015,1115
Adafruit_ADS1115 ads(0x48);                 // 16-bit version
#include <Adafruit_GFX.h>                   // OLED
#include <Adafruit_SSD1306.h>           // OLED
Adafruit_SSD1306 display(0);                // OLED Reset
void setup(void) {
  //Serial.begin(115200);
//  Wire.begin(4,5);                          // OLED:SDA,SCL
  display.begin(SSD1306_SWITCHCAPVCC,0x3c); // I2C ADDRESS=3c
  display.clearDisplay();                   // Clear the buffer
  display.setTextSize(2);                   // font size 4
  display.setTextColor(WHITE);              //
  display.setCursor(0,0);                   //
  ads.setGain(GAIN_TWOTHIRDS);              // 2/3x gain +/-6.144V
  ads.begin();                              // 1 bit=0.1875mV
}
void loop(void) {
  int i=0;
  float v0;
  // // Count and Store data during 1,000 msec
  for(int time = millis(); millis()-time < 1000; i++) {
    v0 = (ads.readADC_SingleEnded(0) * 0.1875/1000); // A0 Read
  }
  display.clearDisplay();
  display.setCursor(0,0);
  display.print(i);
  display.setCursor(0,16);
  display.println(v0,3);
  display.display();
}


参考

  1. https://macsbug.wordpress.com/2016/02/04/i2c-adc-ads1115-in-esp8266/

モニタリング アプリ開発

MIT App InventorとはもともとGoogle Labsで公開されているAndroidアプリを作成ツールです。 今MITに移管された。プログラミングを専門的に学んだことがない学生がプログラムの作り方の基礎を学ぶために作られました。アメリカでは高校やコンピュータサイエンスを専門としない大学での授業でも利用されています。

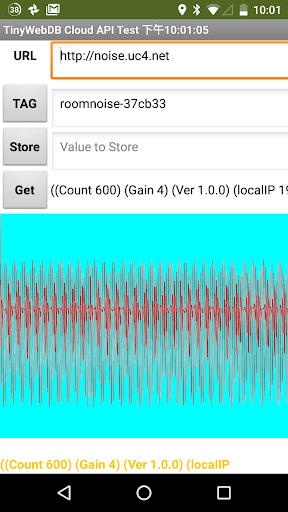
モニタリング アプリ はMIT App Inventorで開発し、エッジクラウドとTinyWebDB APIを用いて通信し、データの確認と修正、削除は可能であり、そして可変ゲインアンのゲインの設定もできる。

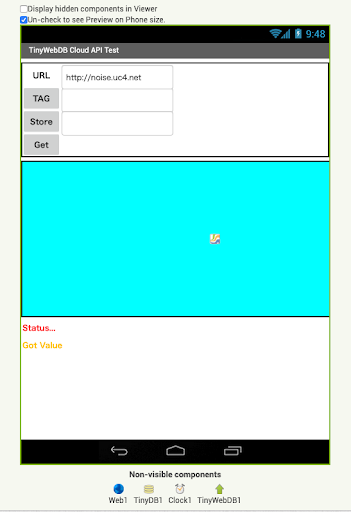
デザイン画面

画面の上部はタグとStoreするためのデータ入力領域、そして中間は生体データ表示エリア、下部はサービスのステータスと生の受信データの表示エリア。

図 4.7 Appデザイン画面

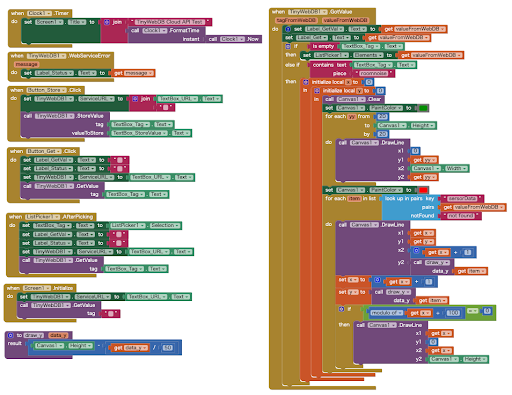
ブロック一覧画面

ブロック一覧画面はアプリの処理を記述する。


主な処理

Button_Get.Click 処理ブロック

指定したWebサービスのURLから、TinyWebDB APIを通して、指定してTagのデータを取得する。このアプリでは、生体データの取得に利用する。


Button_Store.Click 処理ブロック

指定したWebサービスのURLから、TinyWebDB APIを通して、指定してTagのデータを保存する。このアプリでは、可変ゲインアンプに対して、ゲインの設定を指示する。


TinyWebDB1.GotValue

TinyWebDB APIからデータ取得後の処理。 生体データの取得した場合はデータを描画する。

図 4.8 Appブロック一覧画面


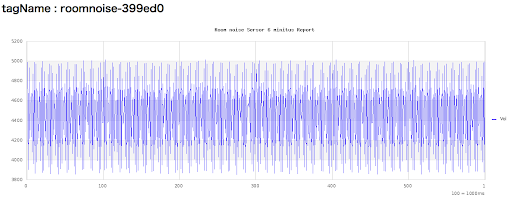
アプリの実行画面は図 4.9 に示すように、Button_Getをクリックすると、最新の6秒間のデータ描画が確認された。

アプリの実行画面

図 4.9 アプリの実行画面

Raspberry PiでUPD構築

エッジクラウドは通信防御に必要なより高度なセキュリティ機能が代行する。エッジ層はデータの一時保存と転送のみ行う、データ蓄積、共有する機能はクラウド層に任せる。そのため単純な構造のコンピューターRaspberry Piでも十分機能する。


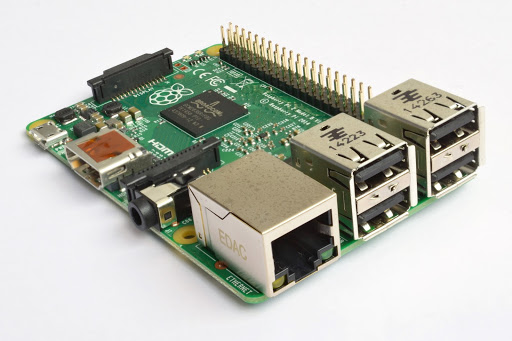
Raspberry Pi(ラズベリー パイ)は、ARMプロセッサを搭載したシングルボードコンピューター。イギリスのラズベリーパイ財団によって開発されている。学校で基本的なコンピュータ科学の教育を促進することを意図している。

図 4.5 Raspberry Pi 

Raspberry Piセットアップ

Raspberry PiはDebianというOSを利用する。予めシステム入れたメディアを購入する、またはOSのファイルをダウンロードし、メディアにセットアップする。

LAMP(ランプ)とは、OSであるLinux、WebサーバであるApache HTTP Server、データベースであるMySQL、スクリプト言語であるPerl、PHP、Pythonを総称した頭文字から成る造語である。動的なウェブコンテンツを含むウェブサイトの構築に適した、オープンソースのソフトウェア群である。

それからRaspberry PiにLAMP環境構築してください。

Web サービスの構築

Webサーバに、われわれはTinyWebDB APIを実装したプログラムをインストールすることでTinyWebDB機能を備えるWebサービスも構築可能である。TinyWebDB APIはWeb管理画面が備え、データの確認と修正、削除は可能である。

見守りデータに特化したデータ処理が必要のため、われわれは上記プログラムをカスタマイズしたプログラムもGitHubリポジトリから取得可能である。

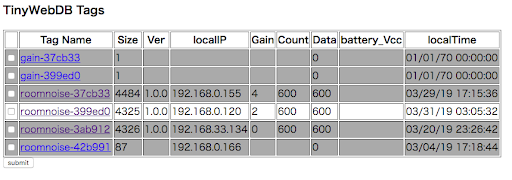
カスタマイズしたTinyWebDB APIプログラムは、データ受信すると、見守りデバイスの一覧が表示でき、デバイスのタグ名、サイズ、ソフトのバージョン、IPアドレス、可変ゲインの設定値、データの数、実際に受信したデータの数と日時状態が容易に判別できる。

データ確認画面:

http://noise.uc4.net/tags.php


図 4.6 カスタマイズしたTinyWebDB APIのWeb管理画面


蓄積した生体信号のデータの表示機能を備えている。

図 4.7 生体信号のデータの表示

Ubi-健康管理(Ubi-Care)

ユビキタス健康管理のUbi-Careフレームワークは、健康データに特化したUPDである。様々個人健康データのセンサーデバイスで構成するセンサーデバイス層、そして個人健康データを集める、初期処理を行うエッジ層、データ蓄積、共有するクラウド層はお互い独立、オープンなAPIで相互接続する。

図 3.1 Ubi-care 分散型フレームワーク


健康データのセンサーが生成するデータ量は多いが価値密度は低く、エッジ層で分散機械学習を行うことによってその価値密度を向上させるとともに、エッジ層で処理することで低レイテンシを実現、ワイヤレス送・受信するための消費電力も大幅軽減可能だ。

データ通信をエッジ層に留めることでプライバシを保護するということが可能に。リソース限定された単独のデバイスの重要なデータや機密データをより安全な環境下で保護する。

UPDフレームワーク

ユビキタス個人データストアUPD(Ubiquitous Personal Datastore)

IoTデバイスから続々とセンサーデータが大量に生成された。しかしIoTデバイスの性能によりセンサーデータ送・受信の軽量化が求められている。

センサーからの大量データがそのままクラウドへ送る場合は遅延が問題になり、またデータ通信のセキュリティが求められ、しかしIoTデバイスのマイクロコントローラは強力な暗号化のために処理能力と電力を消費する余裕はない、データ送・受信プロトコルの軽量化が困難である。この問題を対処するには、センサーの近くにエッジサーバを配置して、さらにエッジサーバにはデータとアプリの分離する、個人データストアUPDフレームワークを提案する。


個人データストアUPDは単純のUPD-APIがもちWebデータベース、IoTデバイスからのデータ送・受信は容易になり、保存したデータは共通のAPIで再利用可能。例えば可視化アプリケーションでデータを可視化する、または解析アプリケーションでデータから価値ある情報を見出す。


クラウドには、個人データはPOD(Personal Online Datasore)に保存する。POD連携アプリケーションは必要なUPDデータのみPODにアップロードする。PODは対応のアプリケーションを通して指定の相手にデータ共有するができる。


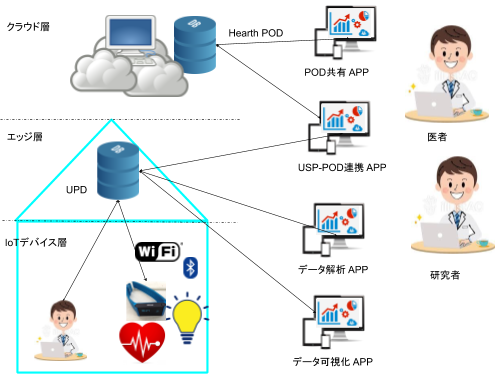
UPD、PODとそれに対応するアプリケーションでUPDフレームワークを構成する。UPDとそのフレームワーク利用によりセンサーデータ送・受信の軽量化と転送遅延、セキュリティ両立できる。


マイクロコントローラは強力な暗号化のために処理能力と電力を消費する余裕はないので、防御に必要なより高度なセキュリティ機能は、近隣のEdge Cloudが代わりに実行する。

図:UPDフレームワーク


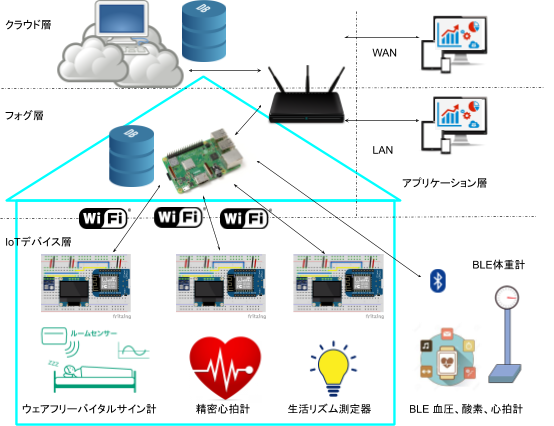
このようにユビキタス個人データストアUPD(Ubiquitous Personal Datastore)は、センサー、フォグ、クラウドの三層構造で構成されたデータとアプリ分散型のフレームワークである。


この三層構造のメリットは、IoTデバイス電力を消費、データ高度なセキュリティための強力な暗号化、大量データ転送するための低レイテンシを両立させた。


IoTデバイス層はデータの収集と転送を専任。リソース限定されたデバイスでも利用可能、消費電力の削減にも役に立つ。


エッジ層は防御に必要なより高度なセキュリティ機能が代行する。エッジ層はデータの一時保存と転送のみ行う、単純な構造のサーバでも十分機能する。

データ蓄積、共有する機能はクラウド層に任せる。PODの共有について、World Wide Webの創始者、Tim Berners-Leeが新しいプロジェクトをSolid PODというプラットフォームを参考してください。

Arduino NANO (7) ADS1115 for A/D

経緯

ADS1115を購入して、生体信号のAD変換に利用するつもりだが、うまくいかない( WeMos (b9) ADS1115 for A/D 参考)、正しい電圧が表示されない。

そこで、Arduino NANOのチュートリアルを探して、検証することに。

ハードウェア

ADS1115とArduino NANOはI2Cで接続。

ソフトウェア

「参考1」コードそのまま。

#include <Wire.h>
#include <Adafruit_ADS1015.h>

Adafruit_ADS1115 ads;  // Declare an instance of the ADS1115

int16_t rawADCvalue;  // The is where we store the value we receive from the ADS1115
float scalefactor = 0.1875F; // This is the scale factor for the default +/- 6.144 Volt Range we will use
float volts = 0.0; // The result of applying the scale factor to the raw value

void setup(void)
{
  Serial.begin(9600); 
  ads.begin();
}

void loop(void)
{  

  rawADCvalue = ads.readADC_Differential_0_1(); 
  volts = (rawADCvalue * scalefactor)/1000.0;
  
  Serial.print("Raw ADC Value = "); 
  Serial.print(rawADCvalue); 
  Serial.print("tVoltage Measured = ");
  Serial.println(volts,6);
  Serial.println();
  

  delay(1000);
}

結果

うまくいく!

電池の電圧はちゃんでシリアルモニターに表示。

参考


http://henrysbench.capnfatz.com/henrys-bench/arduino-voltage-measurements/arduino-ads1115-differential-voltmeter-tutorial/

Arduino NANO (6) Heart rate sensor

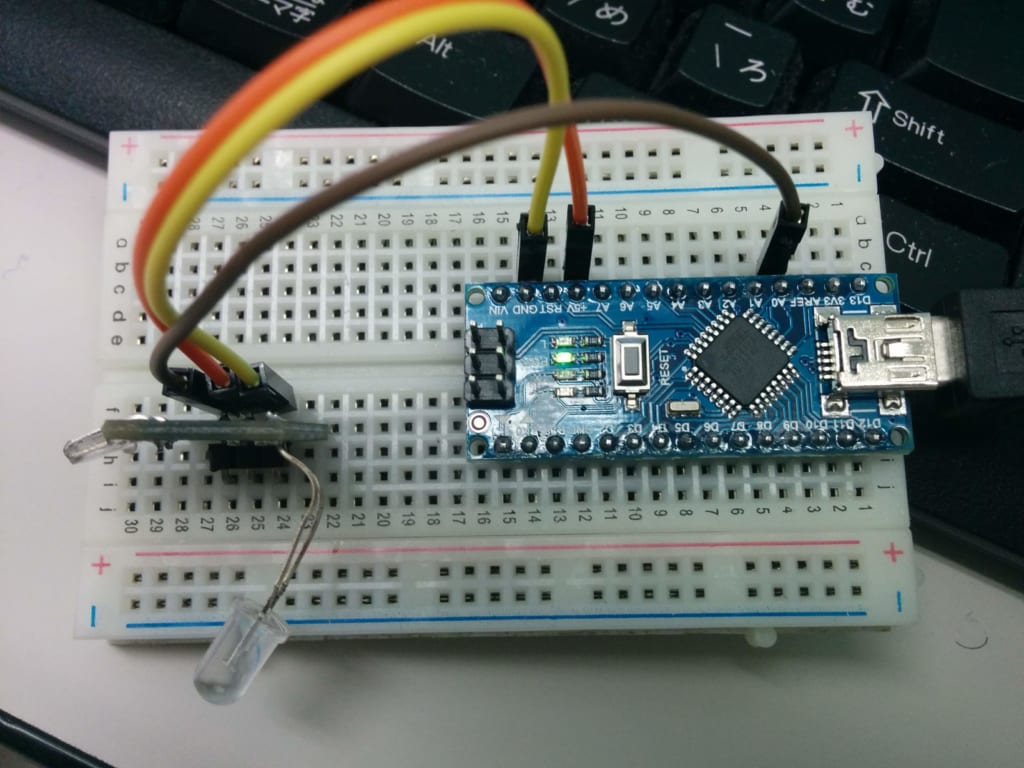
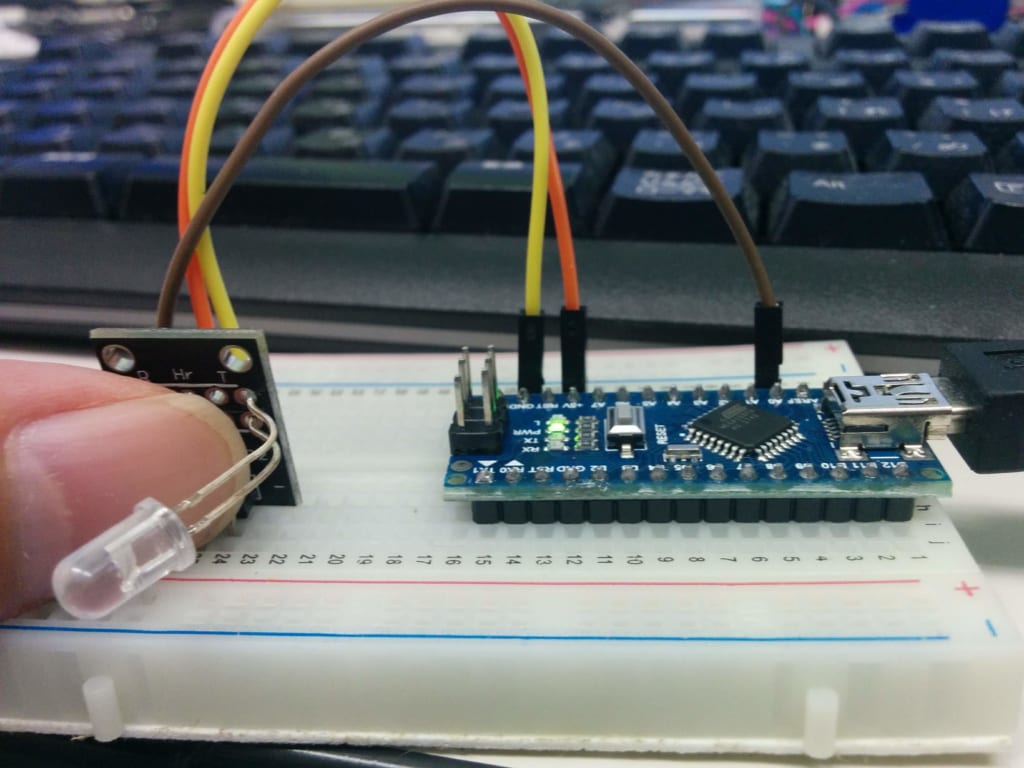
Arduinoセンサーキットに、Heart rate sensorある。

血中ヘモグロビンの近赤外線吸収の性質を利用して脈拍パルス検出するらしい。

Arduinoとの接続は3線(GND、VCC、アナログ入力)のみ。

「参考1」をみて、まず簡単の試す。ただA0の値を表示。

// Pulse Monitor Test Script
int sensorPin = 0;
void setup() {
   Serial.begin(9600);
}
void loop ()
{
   while(1)
   {
     Serial.print(analogRead(sensorPin));
     Serial.print('\n');
   }
}

指先センサー装着

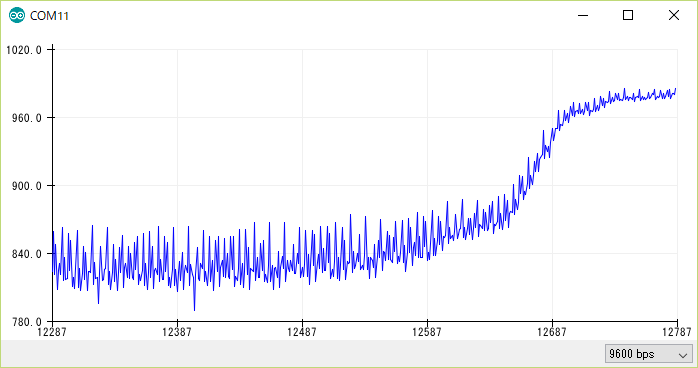
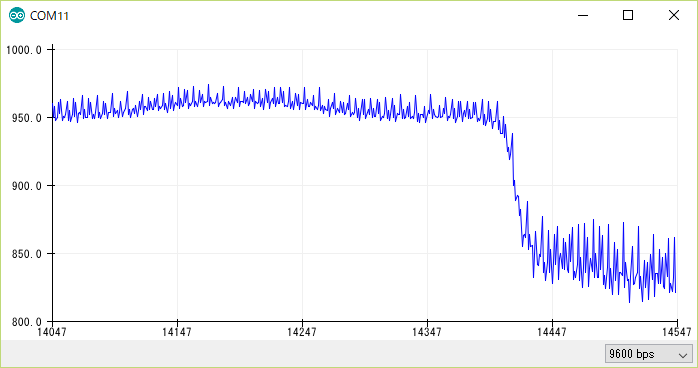
シリアルプロッターに見える上昇カーブ

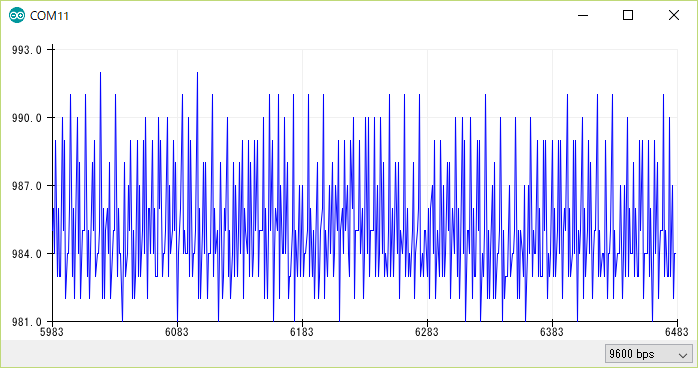
安定した状態これはなにもわからない

指はセンサーから離れる時の下降カーブ。

「参考1」を参考して、Smoothingしても、同じ判別不能。困った。

#define samp_siz 4
#define rise_threshold 5
// Pulse Monitor Test Script
int sensorPin = 0;
void setup() {
   Serial.begin(9600);
}
void loop ()
{
   float reads[samp_siz], sum;
   long int now, ptr;
   float last, reader, start;
   float first, second, third, before, print_value;
   bool rising;
   int rise_count;
   int n;
   long int last_beat;
   for (int i = 0; i < samp_siz; i++)
     reads[i] = 0;
   sum = 0;
   ptr = 0;
   while(1)
   {
     // calculate an average of the sensor
     // during a 20 ms period (this will eliminate
     // the 50 Hz noise caused by electric light
     n = 0;
     start = millis();
     reader = 0.;
     do
     {
       reader += analogRead (sensorPin);
       n++;
       now = millis();
     }
     while (now < start + 20);  
     reader /= n;  // we got an average
     // Add the newest measurement to an array
     // and subtract the oldest measurement from the array
     // to maintain a sum of last measurements
     sum -= reads[ptr];
     sum += reader;
     reads[ptr] = reader;
     last = sum / samp_siz;
     // now last holds the average of the values in the array
     // check for a rising curve (= a heart beat)
     if (last > before)
     {
       rise_count++;
       if (!rising && rise_count > rise_threshold)
       {
         // Ok, we have detected a rising curve, which implies a heartbeat.
         // Record the time since last beat, keep track of the two previous
         // times (first, second, third) to get a weighed average.
         // The rising flag prevents us from detecting the same rise 
         // more than once.
         rising = true;
         first = millis() - last_beat;
         last_beat = millis();
         // Calculate the weighed average of heartbeat rate
         // according to the three last beats
         print_value = 60000. / (0.4 * first + 0.3 * second + 0.3 * third);
         Serial.print(print_value);
         Serial.print('\n');
         third = second;
         second = first;
       }
     }
     else
     {
       // Ok, the curve is falling
       rising = false;
       rise_count = 0;
     }
     before = last;
     ptr++;
     ptr %= samp_siz;
   }
}

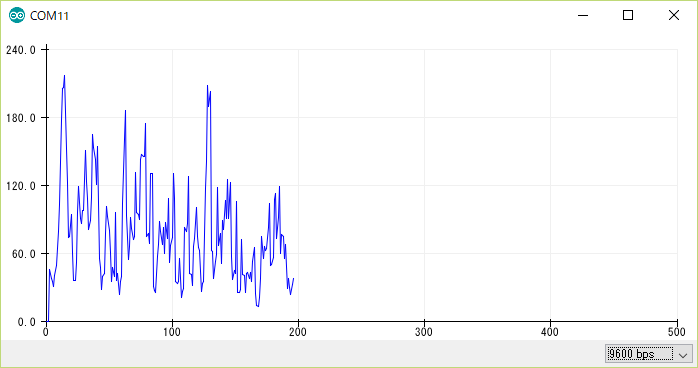
こんな図形になって、周囲の雑音とか酷いかな?

参考:

  1. https://www.hackster.io/Johan_Ha/from-ky-039-to-heart-rate-0abfca

Arduino NANO (5) MAX30102 Pulse Ox Sensor

試み

MAX30102 というPulse Ox Sensorを利用して、脈拍と酸素濃度を測る試み。

MAX30100の実例が多いが、MAX30102の実例が少ない。

プログラム

「参考1」のSparkFunのライブラリを利用する。そのライブラリはMAX30105(R,G,IR LED)用だが、MAX30102(欠Green LED)でも利用できる。

OLED表示するため、「参考2」の表示部分を合体した。なんとなく、バグがある様な気がする。

// Sample implementation of the MAX30100 PulseOximeter
// Using the following module
// http://www.ebay.com/itm/-/391709438817?ssPageName=STRK:MESE:IT
// can not gaurantee if the app will work with other implementations of the module. 

//#include "MAX30100_PulseOximeter.h"
#include <U8g2lib.h>
#include <Wire.h>
#include "MAX30105.h"
#include "heartRate.h"

#define REPORTING_PERIOD_MS     500

 U8G2_SSD1306_128X32_UNIVISION_F_HW_I2C u8g2(U8G2_R0);

// PulseOximeter is the higher level interface to the sensor
// it offers:
//  * beat detection reporting
//  * heart rate calculation
//  * SpO2 (oxidation level) calculation
//PulseOximeter pox;
MAX30105 particleSensor;

const byte RATE_SIZE = 4; //Increase this for more averaging. 4 is good.
byte rates[RATE_SIZE]; //Array of heart rates
byte rateSpot = 0;
long lastBeat = 0; //Time at which the last beat occurred

float beatsPerMinute;
int beatAvg;

//byte pulseLED = 13; //Must be on PWM pin
//byte readLED = 11; //Blinks with each data read
//
bool calculation_complete=false;
bool calculating=false;
bool initialized=false;
byte beat=0;

void show_beat() 
{
  u8g2.setFont(u8g2_font_cursor_tf);
  u8g2.setCursor(8,10);
  if (beat==0) {
    u8g2.print("_");
    beat=1;
  } 
  else
  {
    u8g2.print("^");
    beat=0;
  }
  u8g2.sendBuffer();
}

void initial_display() 
{
  if (not initialized) 
  {
    u8g2.clearBuffer();
    show_beat();
    u8g2.setCursor(24,12);
    u8g2.setFont(u8g2_font_profont15_mr);
    u8g2.print("Place finger");  
    u8g2.setCursor(0,30);
    u8g2.print("on the sensor");
    u8g2.sendBuffer(); 
    initialized=true;
  }
}

void display_calculating(int j)
{
  if (not calculating) {
    u8g2.clearBuffer();
    calculating=true;
    initialized=false;
  }
  show_beat();
  u8g2.setCursor(24,12);
  u8g2.setFont(u8g2_font_profont15_mr);
  u8g2.print("Measuring..."); 
  u8g2.setCursor(0,30);
  u8g2.print(beatsPerMinute);
  u8g2.print(" Bpm");
  u8g2.sendBuffer();
}

void display_values()
{
  u8g2.clearBuffer();
  u8g2.setFont(u8g2_font_profont15_mr);
 
  u8g2.setCursor(0,30);
  u8g2.print(beatsPerMinute);
  u8g2.print(" Bpm _ ");
  u8g2.setCursor(65,30);  
  u8g2.print(beatAvg);
  u8g2.sendBuffer();
}

void setup()
{
    Serial.begin(115200);
    
//    pinMode(pulseLED, OUTPUT);
//    pinMode(readLED, OUTPUT);

    u8g2.begin();

    // Initialize sensor
    if (!particleSensor.begin(Wire, I2C_SPEED_FAST)) //Use default I2C port, 400kHz speed
    {
      Serial.println(F("MAX30105 was not found. Please check wiring/power."));
      while (1);
    }    

    particleSensor.setup(); //Configure sensor with default settings
    particleSensor.setPulseAmplitudeRed(0x0A); //Turn Red LED to low to indicate sensor is running
    particleSensor.setPulseAmplitudeGreen(0); //Turn off Green LED
    
    initial_display();
}


void loop()
{

  long irValue = particleSensor.getIR();
  float temperature = particleSensor.readTemperature();
//  digitalWrite(readLED, !digitalRead(readLED)); //Blink onboard LED with every data read

  if (checkForBeat(irValue) == true)
  {
    calculation_complete=true;
    calculating=false;
    initialized=false;

//    digitalWrite(pulseLED, !digitalRead(pulseLED)); //Blink onboard LED with every Beat
    //We sensed a beat!
    long delta = millis() - lastBeat;
    lastBeat = millis();

    if (delta < 10000) {
      beatsPerMinute = 60 / (delta / 1000.0);
    } else {
      calculation_complete=false;
      beatsPerMinute=0;
      initial_display();
    }
    
    if (beatsPerMinute < 255 && beatsPerMinute > 20)
    {
      rates[rateSpot++] = (byte)beatsPerMinute; //Store this reading in the array
      rateSpot %= RATE_SIZE; //Wrap variable

      //Take average of readings
      beatAvg = 0;
      for (byte x = 0 ; x < RATE_SIZE ; x++)
        beatAvg += rates[x];
      beatAvg /= RATE_SIZE;
      display_values();
    }
  } else {
    if (irValue < 50000) {
      calculating=false;
      initial_display();
    } else {
      display_calculating(5);
    }
  }

  Serial.print("IR=");
  Serial.print(irValue);
  Serial.print(", BPM=");
  Serial.print(beatsPerMinute);
  Serial.print(", Avg BPM=");
  Serial.print(beatAvg);
  Serial.print(", initialized=");
  Serial.print(initialized);
  Serial.print(", calculating=");
  Serial.print(calculating);
  Serial.print(", calculation_complete=");
  Serial.print(calculation_complete);
  Serial.println();


}


実験

かなり不安定の感じがする。


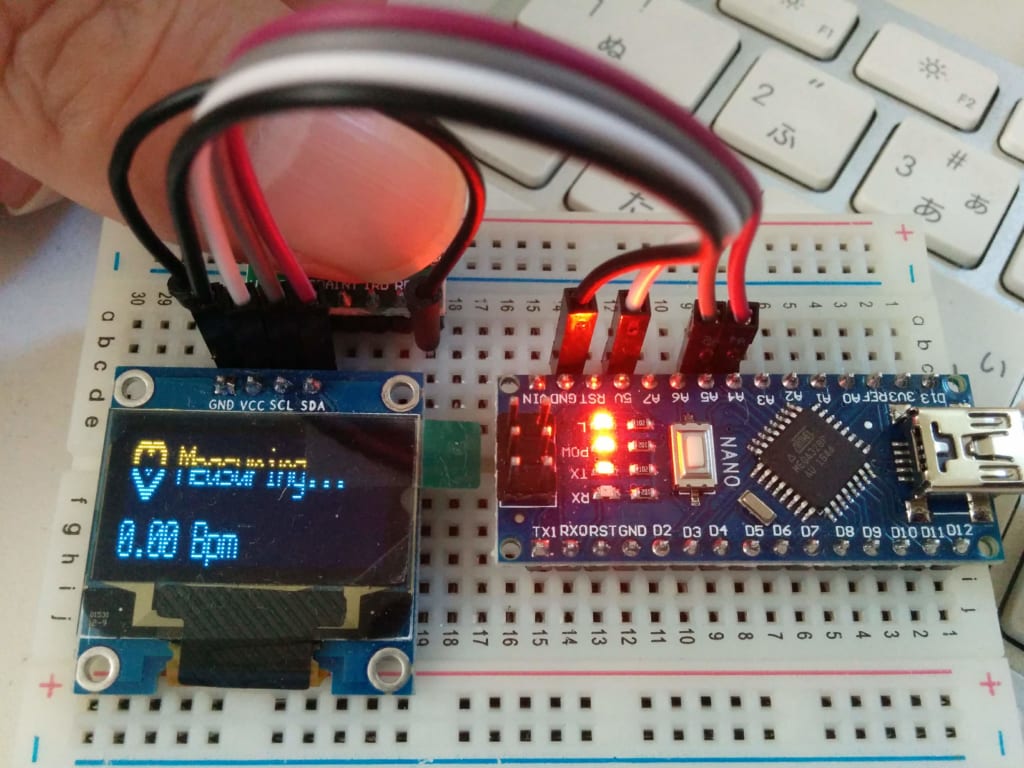
一応、形はできたが、

しかし、脈拍捉えるのは稀て、今回も失敗して。。。

参考

  1. https://learn.sparkfun.com/tutorials/max30105-particle-and-pulse-ox-sensor-hookup-guide
  2. https://www.hackster.io/umar-sear/arduino-heart-rate-monitor-a8e9e1
  3. https://www.hackster.io/AAKS/max30100-and-blynk-0f58f4